
I love my old MacBook Pro 15” Retina Display Mid 2012. Old, but still working after 8 years I bought it in 2012. Having this MBP also became my first experience of purchasing an Apple product directly in the Online Apple Store, since I lived in the country where the Official Apple Store does not exist (probably will never exist for the near future).
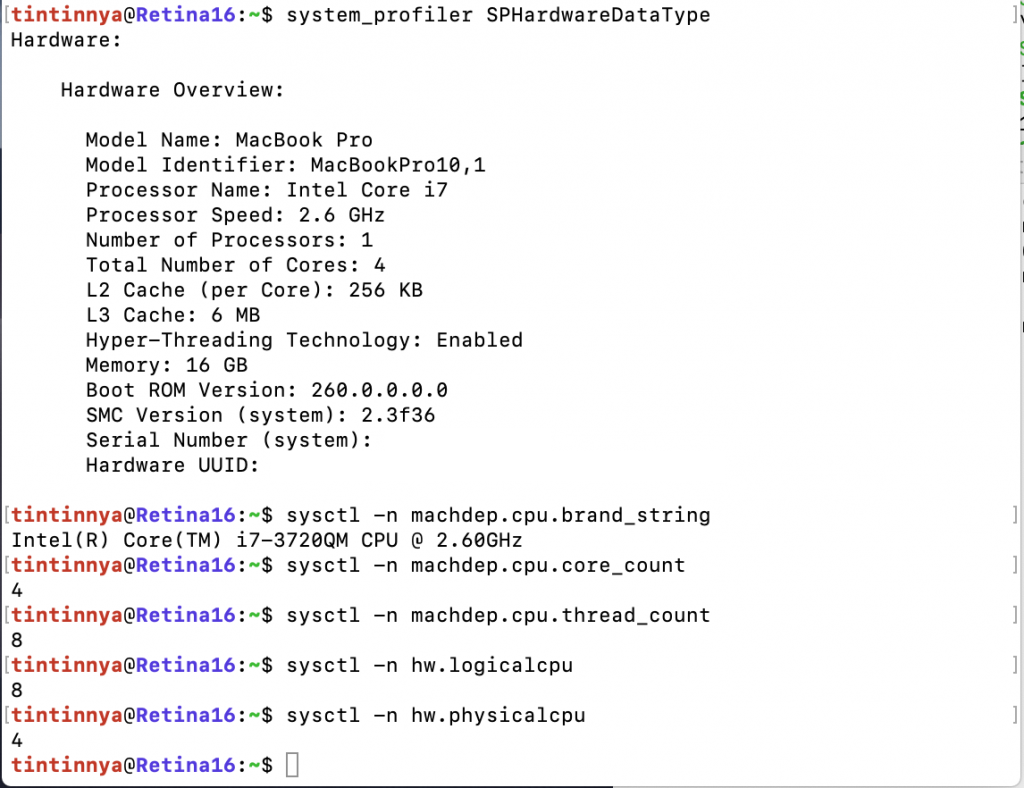
Using command system_profiler SPHardwareDataType [from here] and sysctl -n machdep.cpu.brand_string [from here], here’s my processor info.

Updated June 13, 2020:—–
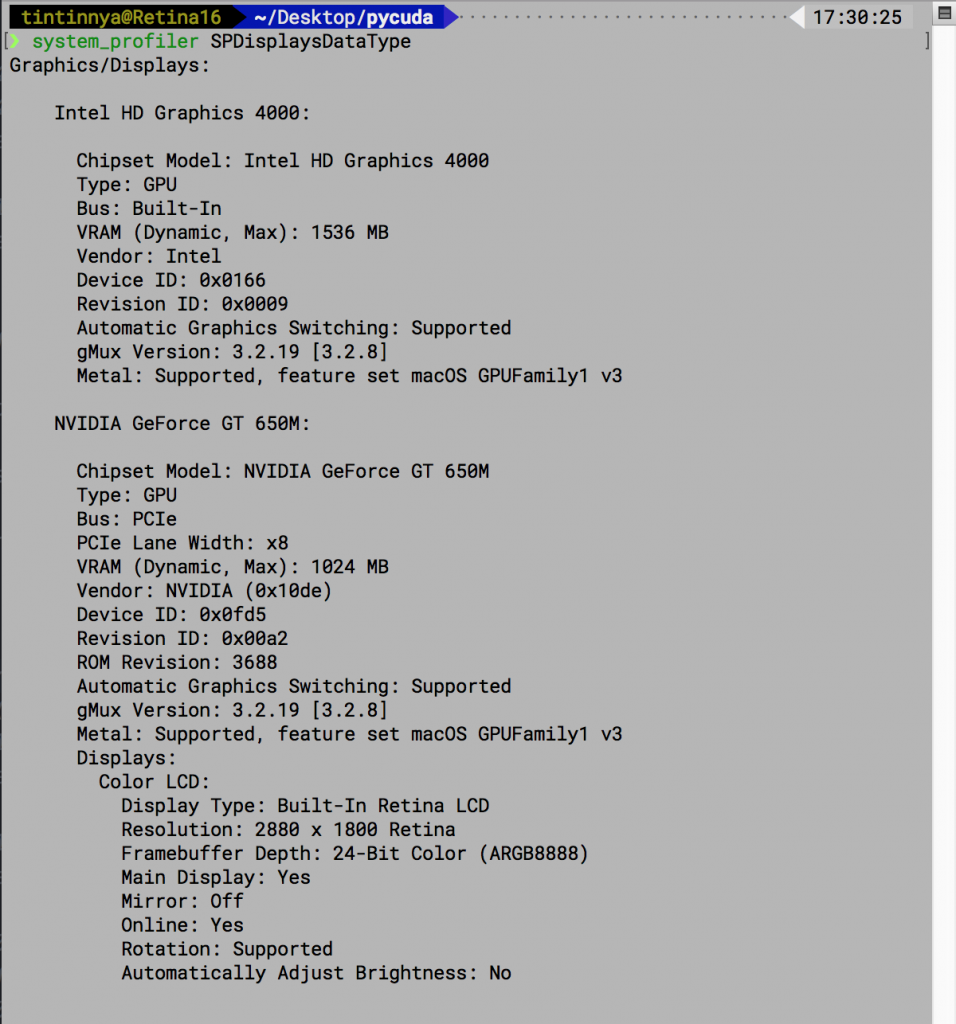
Using command system_profiler SPDisplaysDataType [from here] to show my GPU information.

— end of Update June 13, 2020
What made me proud of this MBP was the capability of this laptop to run 7 virtual machines when I did my Applied Information Assurance class from CMU INI. VMware Fusion detected that the maximum virtual CPU that can be used are 8 virtual CPUs. The simulation went smooth, I can generate attacking traffic and the defense nodes can capture and detect those traffic without even a single packet loss.
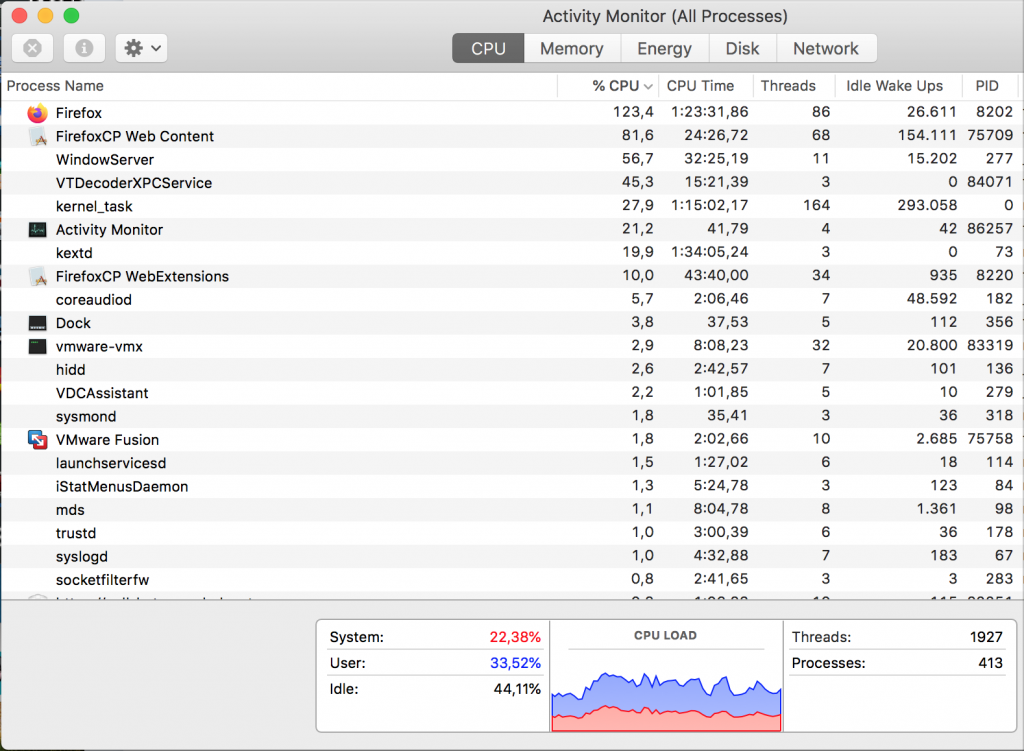
But unfortunately, time passed by. I am surprised that it is easy to make this MBP overwhelmed with the daily tasks and CPUs show the load more than 100%. Yes, more than 100%, sometimes it can be up to 689% CPU load by the process named kernel_task when I had video call or video conference. This is the example when I just started VMware Fusion after browse lots of videos using Firefox.

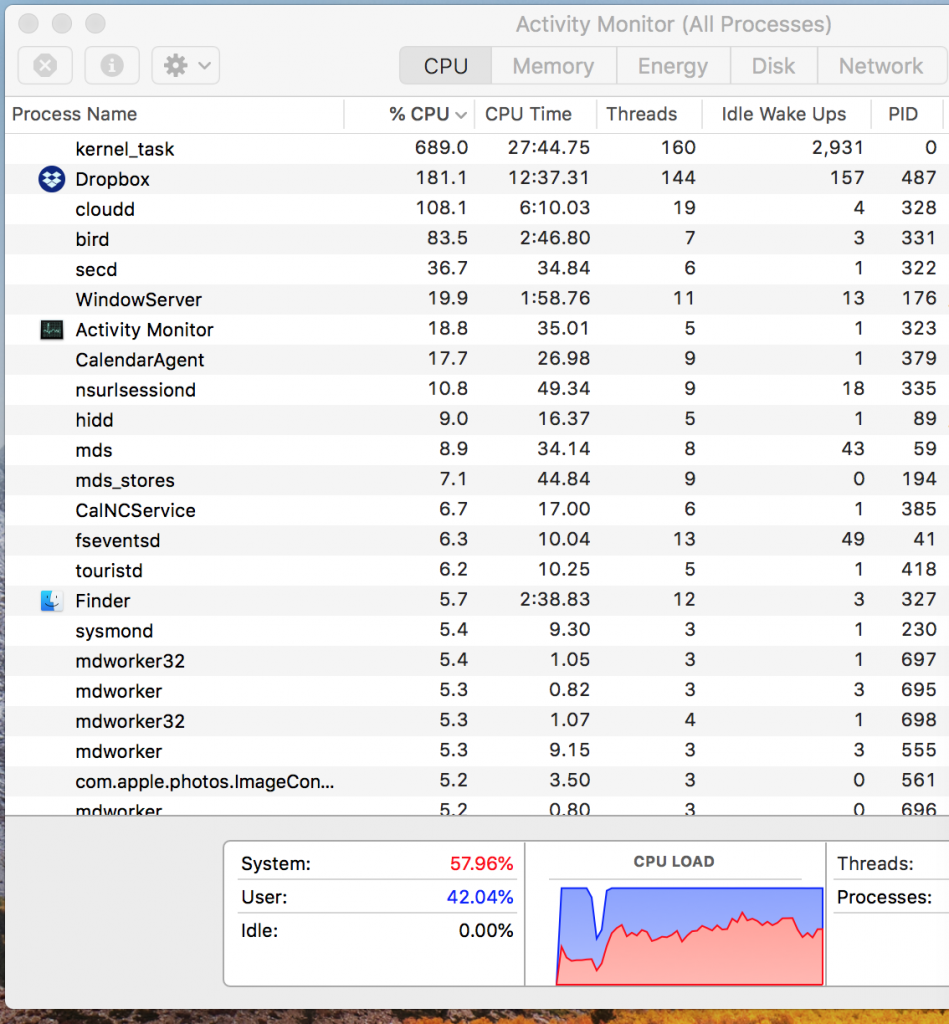
This is the example when I just synced Dropbox and plugged in external drive. The mdworker is working to index the content of hard drive when Spotlight setting was defaulted to index everything.

In the era of Work From Home, everything should be done online. I am a part-time lecturer in a private university in town. Using “Sharing Screen” for my presentation, and drawing illustrations using virtual whiteboard from my Apple iPad Air Pro 9.7” and Apple Pencil, were the common tasks that can kill my teaching experiences. The students sometimes “complained” with the lagging presentation.
I don’t know when the WFH era will be changed to WFO (Work-From-Office). I need to refresh my MBP to make this like a new one! Here’s what I’ll do and this writing serves as my personal memo for future reference. Initially, I had a plan to install macOS Mojave. But, even in MacBook Pro 2019 with Intel(R) Core(TM) i7-8850H with 16GB DDR4 RAM, macOS Mojave consumes more resources than macOS HighSierra. Hence, I am stick to the macOS High Sierra instead.
- Download Mojave Installer from Mac App Store, even when latest macOS available on App Store
- Create bootable installer for macOS Mojave
- Boot from USB drive as startup disk
- Erase Disk for new macOS
- Install macOS Mojave
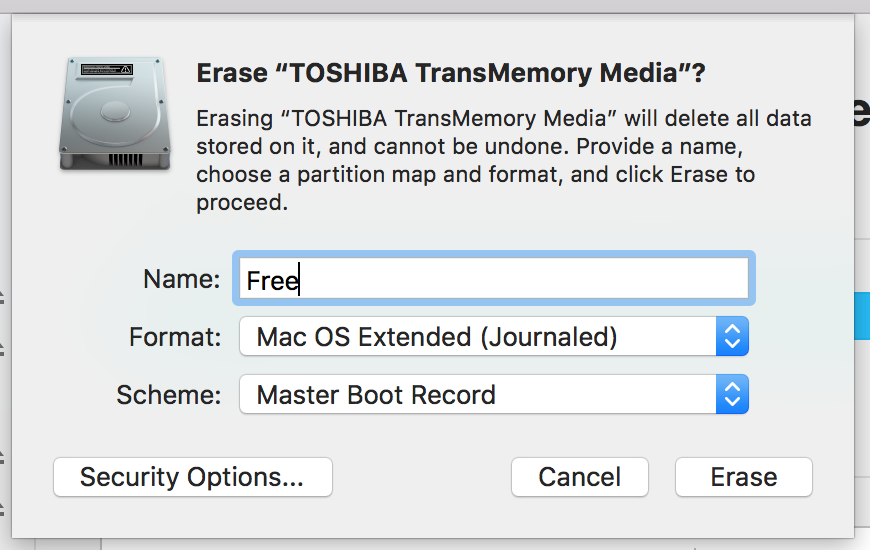
Most of references are directly from Apple web. The installation process is straight forward. The USB Flash Drive should be formatted as MacOS Extended (Journaled) File System.
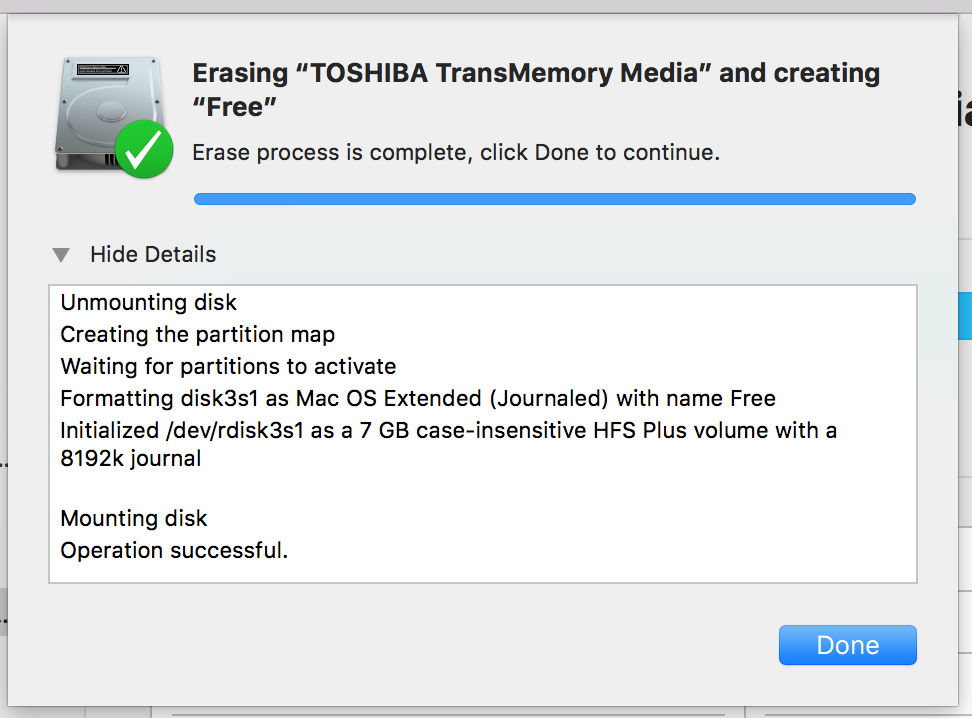
List all of the available volumes. Pick which volume is for your USB Flash Drive. And use command:
sudo ./Install\ macOS\ High\ Sierra.app/Contents/Resources/createinstallmedia --volume /Volumes/Free

